Hyper-V Server is a fully free virtualizer provided by Microsoft, containing a hypervisor and virtualization components such as the Windows Server version, delivered in the core version, i.e. without the graphical mode. The version of Microsoft Hyper-V Server 2019 is particularly noteworthy due to the many improvements introduced in it compared to previous versions. In the post below, I will try to bring the system implementation closer to your needs.
Hyper-V Server 2019 installation
The installation of Hyper-V Server 2019 is carried out in a standard way and the installer is the same as in the case of Windows Server or Windows 10. During the first run, we will be asked to set a password for the Administrator account and after successfully completing this stage, we will be logged into the system. After that, the sconfig utility will start, which allows you to set the basic parameters of the system.
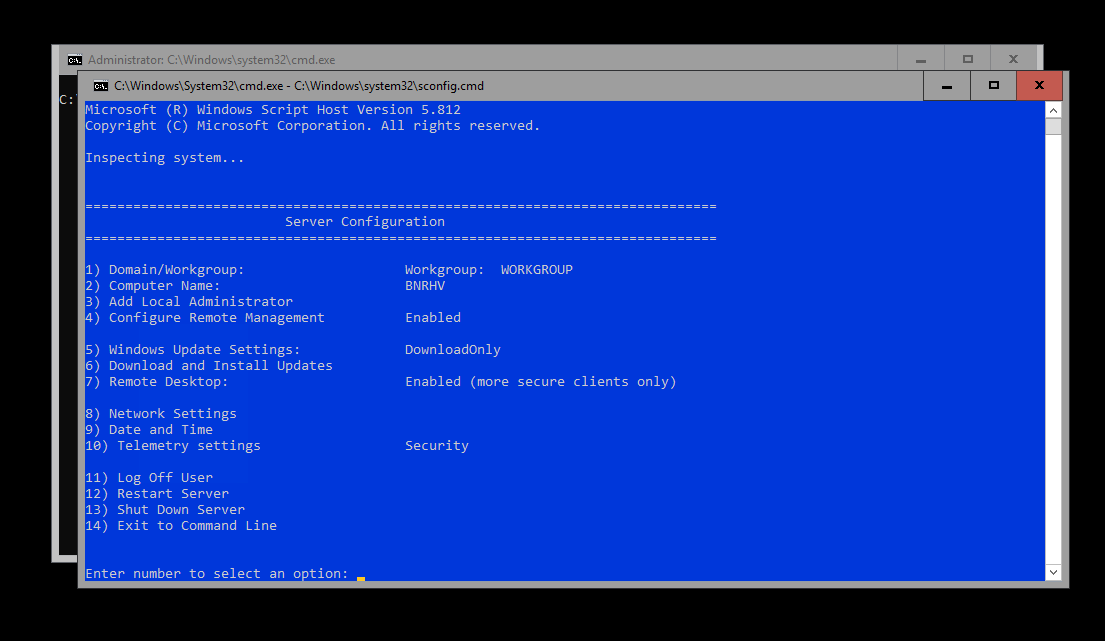
sconfig tool
With the sconfig we set the correct Computer Name, Remote Management, Remote Desktop, Windows Update and we can add the server to the domain.
At this point, it should be added that the server can also be managed by other tools such as Server Manager or Windows Admin Center, to which I will dedicate the next post.
Configuration of virtual switches
We start the configuration from displaying the network interfaces available in the system, e.g. with the command:
Get-NetAdapterIn my case, I have 2 network cards available that I will use for communication in the local area network (LAN) and an interface that will be exposed to the Internet (WAN). For this purpose, we start by creating virtual switches and use the name of the interface returned by the Name field and enter it in the NetAdapterName switch of the New-VMSwitch command:
New-VMSwitch -Name "LAN" -NetAdapterName "Ethernet" -AllowManagementOS $true
New-VMSwitch -Name "WAN" -NetAdapterName "Ethernet 2" -AllowManagementOS $true
Nextly we will set IP and DNS addresses for virtual switches. For that we will need the Interface Index (ifIndex) returned by the Get-NetAdapter command, which must be redone after creating the new interfaces:
New-NetIPAddress -InterfaceIndex <ifIndex> -IPAddress <IP address> -PrefixLength <mask> -DefaultGateway <gateway IP>
Set-DnsClientServerAddress -InterfaceIndex <ifIndex> -ServerAddresses <DNS server IP address> -PassThru
After setting the IP addresses and checking communication, I turn off DHCP and IPv6, which I do not use:
Get-NetAdapterBinding -ComponentID ‘ms_tcpip6’ | Disable-NetAdapterBinding -ComponentID ‘ms_tcpip6’ -PassThru
Set-NetIPInterface -InterfaceIndex <ifIndex> -Dhcp Disabled
Connecting to a Hyper-V host with the Hyper-V Manager console
Hyper-V Manager is an essential virtualization management tool. If we do not have it installed on our system, you can do it in the Control Panel (Programs and Functions) or in PowerShell. Install by running PS command (as an administrative user):
Enable-WindowsOptionalFeature -Online -FeatureName Microsoft-Hyper-V-Tools-All -AllTo be able to connect Hyper-V Manager from your computer to the newly installed system, in addition to network connectivity, you need to configure remote management. This can be configured via option # 4 in sconfig or PS command as below:
Enable-PSRemotingIf we operate in an environment with configured Active Directory service, we run Hyper-V Manager as a user who is a member of appropriate groups that allow you to manage the Hyper-V service. In order to add a new server, select Action and then Connect to Server.

In an environment where there is no Active Directory domain configured, you need to configure the delegation of permissions. On the server, you need to unlock the rule on the firewall and run CredSSP authentication with the command:
Enable-WSManCredSSP -Role serverOn the client, you need to configure the WinRM mechanism, for example with a command in cmd, answering the questions positively:
winrm quickconfigNextly we add the server to trusted hosts:
Set-Item WSMan:\localhost\Client\TrustedHosts -Value "BNRHV"We allow the delegation of server permissions:
Enable-WSManCredSSP -Role client -DelegateComputer "BNRHV"Additionally, we allow the delegation of NTLM permissions for server authentication:
New-Item -Path "HKLM:\SOFTWARE\Policies\Microsoft\Windows\" -Name 'CredentialsDelegation'
New-ItemProperty -Path "HKLM:\SOFTWARE\Policies\Microsoft\Windows\CredentialsDelegation\" -Name 'AllowFreshCredentialsWhenNTLMOnly' -PropertyType DWord -Value "00000001"
New-ItemProperty -Path "HKLM:\SOFTWARE\Policies\Microsoft\Windows\CredentialsDelegation\" -Name 'ConcatenateDefaults_AllowFreshNTLMOnly' -PropertyType DWord -Value "00000001"
New-Item -Path "HKLM:\SOFTWARE\Policies\Microsoft\Windows\CredentialsDelegation\" -Name 'AllowFreshCredentialsWhenNTLMOnly'
New-ItemProperty -Path "HKLM:\SOFTWARE\Policies\Microsoft\Windows\CredentialsDelegation\AllowFreshCredentialsWhenNTLMOnly\" -Name '1' -Value "wsman/BNRHV"
Note that we were adding permissions after the server’s domain name and the DNS configured on the system may not have an entry for the new server. In order to avoid problems with connectivity, let’s add an entry in the hosts file:
Add-Content -Path C:\Windows\System32\drivers\etc\hosts -Value "`n192.168.1.200`tBNRHV"In the Hyper-V Manager console, we can connect to the server via an administrative user by selecting the Connect as another user option.
Installing Features On Demand
In Hyper-V Server 2019, support for FODs has been added, which allow you to run some window applications, e.g. explorer, control, mmc etc.
Add-WindowsCapability -Online -Name ServerCore.AppCompatibility~~~~0.0.1.0In many cases, this will help us manage the system. Below is an example of starting the control panel and firewall console.
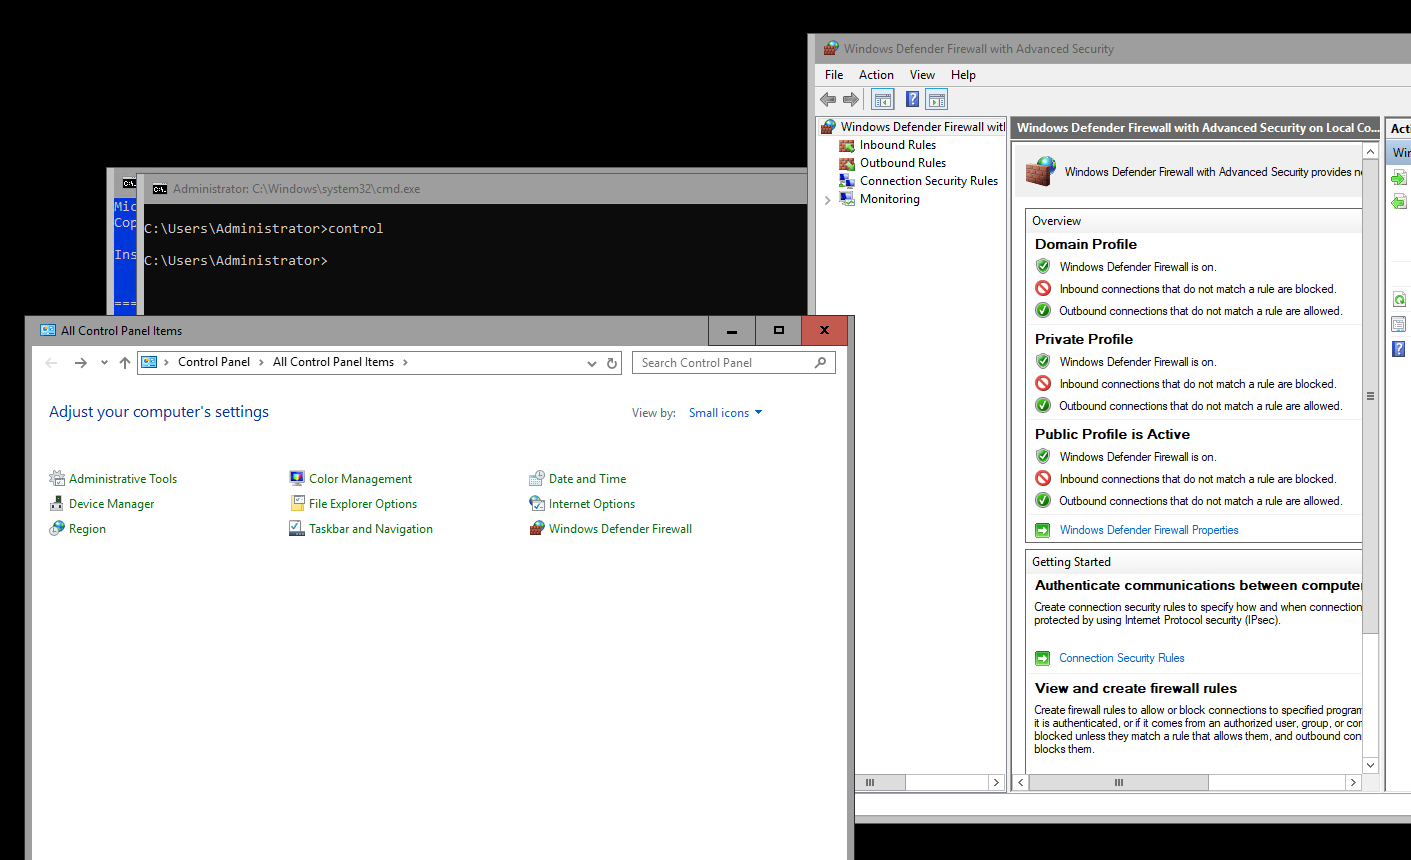
Control panel view and running Windows Defender Firewall console in Hyper-V Server 2019
Summary
In the above post, I presented how to basicly configure Hyper-V Server 2019 to run the environment for creating virtual machines. Additionally, Hyper-V Server 2019 allows you to configure the replication mechanism between hosts running the Hyper-V service, live migration without system interruption or the Hyper-V Failover Cluster service. This solution allows for a significant reduction in costs when used in test, development and production environments.